Micrometer screw gauge
Description:
-
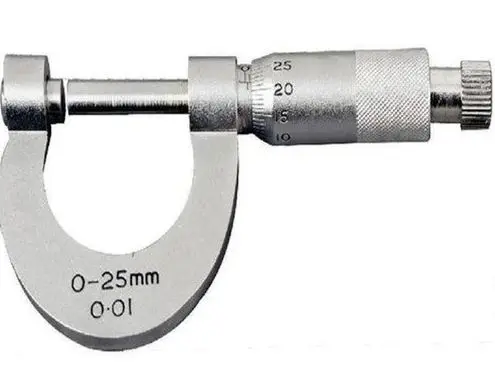
Structure: A micrometer screw gauge typically consists of two main parts: a frame and a spindle. The frame is a C-shaped metal body, and the spindle is a screw that moves when rotated, allowing for the measurement of small distances.
-
Anvil and Spindle: The anvil is a stationary part that holds one side of the object being measured. The spindle (which is attached to a movable part) moves toward the anvil when you rotate the thimble, allowing you to measure the thickness or diameter of an object between the two.
-
Thimble: The thimble is the part you rotate to move the spindle. It has fine markings that allow you to measure very small distances, usually in 0.01 mm or 0.001 mm increments.
-
Scale: Micrometers are usually equipped with two scales:
-
Main scale: This is the linear scale, usually engraved on the frame, that shows the millimeter or inch increments.
-
Rotating thimble scale: This scale allows you to read finer measurements, typically 0.01 mm per graduation.
-
Common Uses:
-
Mechanical Engineering: For measuring parts, tools, or machine components.
-
Manufacturing and Quality Control: Used to ensure parts meet specified tolerances during production.
-
Scientific and Lab Work: For precise measurements in experiments, particularly in material sciences.

